


This Blog is for commercial photographer David Tejada. David shoots assignment photography for fortune 500 companies worldwide. He has specialized in annual reports, corporate brochures, editorial and advertising work for 30 years.


 During my week of teaching at the Maine Media Workshops, I did a quick demonstration outside of the studio in downtown Rockport. On the shadow side of the building, I positioned a workshop participant outside of one of the doorway. I wanted to create a feeling of a late evening with someone standing under a street light or some other sort of light source.
 After looking at my LCD screen and determining that the photo above did not look like night time, I then under-exposed the scene by about 2 stops perhaps 2 1/2 stops. I had a fellow student hold the light over head and I adjusted the power for the aperture I was shooting at. Here is another view with the light moved with a different composition. You can actually see the paint pole in the shot.
 While teaching up in Maine this past September, I demonstrated a proper bounce technique for a few of the students. We came downstairs from the studio to the new Maine Media Gallery on the main floor of the Shepherd Building in Rockport.
 In the photo above, on the right side you can see the strobe. I have placed a flag or gobo on the side of the flash closest to the subject. The strobe is lighting the adjacent wall on the left of the frame. The wall which is lit, now becomes my flat screen softbox.


 We still have space for a few more folks, I hope you'll join me on this wonderful Trek. For more information and booking a place on the trek click HERE


 The LTp was designed to fit into a laptop pocket of your camera bag or backpack which makes it that much more convenient to carry a larger SoftBox.
 This new SoftBox has over 120 sq. inches of surface area, a vast improvement over the smaller SoftBox III. I'll be carrying one of these in may bag for those quick and easy portraits we sometime have to make. Here are a couple of more images, the second one is when I moved the flash to camera left and moved into high speed sync in order to get that beautiful shallow depth of field.

 One of the many lighting techniques I enjoy sharing with students is the simulation of sunlight. When I'm scouting a new location, I am making notice of any available window that I might be able to push light through. My hotel room was on the 14th or 15th floor, not the sort of room that you might normally think about being able to get your light up to. In this case, I had a corner suite and a view of the elevators across a portion of the atrium.
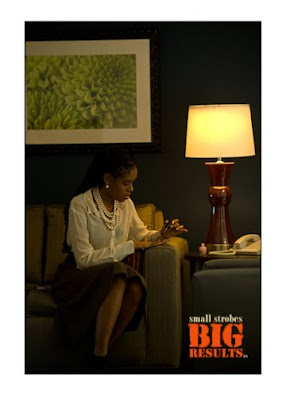
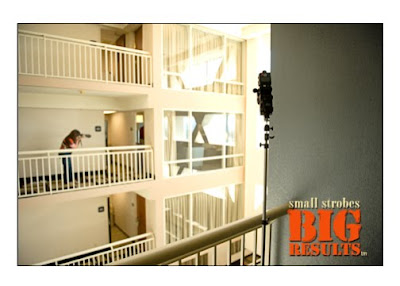 In the above photo you can see the room where Tatiana was seated in the top photo. I used a ball bungee to hold two SB-800 strobes together. I placed a full CTO gel on each of the strobes to provide additional warms to the image.
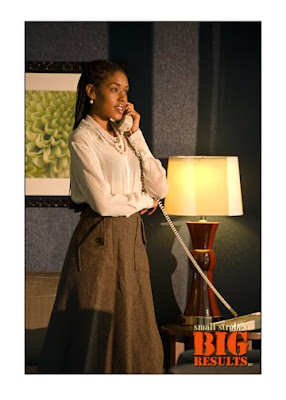 Here is one of the workshop participants sharing images with Tatianna on the sofa.
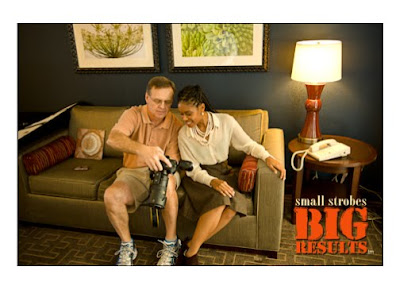 When ever I walk into a new location, I am always looking for all the possible options available to me to make light. Just think, it could have been raining outside and your still able to bring a bit of sunshine into the photos.
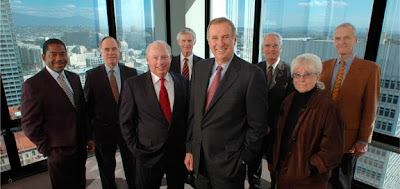 I found this older image in my files recently and thought it would be a good topic of discussion. I can't tell you how many times clients ask me if we can use the view out the window in a photograph. They are not my favorite sort of image to shoot for some of the most obvious reasons, reflections.
 Being a corporate photographer, portraits of guys in ties are a big part of my business. Being able to pull off a simple portrait in a short amount of time is very important. Executives have only have a short amount of time to give you and the faster you can get their portrait the happier they are.


 The photo at the top of this post was made using a single SB-800 held by one of our trekkers. The flash was just outside of the image area, and the trekkers used her left hand to flag the flash from the camera lens. I first metered for the ambient light, under exposing it by about 1 1/2 stops in order to make the sky more dramatic. Once the ambient was set, I adjusted the flash power using the built in commander on my D700. The flash was set to channel 1 Group A.
 I've been a location photographer for more than 25 years, knowing where and when the sun rises and sets is very important to my business. With the advent of the Internet as well as some fantastic web sites, this task could never be more simply.
 Several weeks ago I was teaching at the Maine Media Workshops. I love teaching there, what a great place to visit and a wonderful staff at the school. I would like to thank my TA "Justin Clamp" Jason Esposito for working so hard during the week. I look forward to teaching in Maine next year!

 During my March SSBR workshop in Denver, I photographed Andrea using this technique. The take the FourSquare™ block and I slide a 60" umbrella and a 43" umbrella into the umbrella shaft holder, there are two. As you can see from the image above, the 60" umbrella is used as a shoot through and the 43" as the bounce. The 43" has the black cover over it and as mentioned, the 60" is close to the subject in the shoot through position.
 This is an incredible light, large, soft and just plan beautiful. In the image below you can see the quality of light produced from this set up. My WB in the camera was set to Daylight for the image below.
 I later placed a full cut CTO over the flash head and shifted my WB to 3030*K. The resulting blue shift in the background is from the daylight coming through the window in the back of the scene. Those results can be seen in the image below.
 You can view more workshop images created during various SSBR workshops HERE This link will take you to a new web site I created at SquarSpace, I hope you like it.


