Wednesday, August 31, 2011

Bay Area Nikon CLS Lighting Workshop Oct. 22&23

For those of you Nikon shooter, I'll be teaching a two day CLS lighting workshop in the Oakland bay area. I only teach a few of these workshops annually, and this one will be held on October 22 & 23rd, 2011.

I taught this workshop at the same location last year, we'll be shooting at the Crowne Plaza Hotel in Union City/Oakland, CA. This is a great location to hold a workshop, we had a wonderful group of students and a super model for the two day workshop. Here are some of those images from our workshop last year.


We have a few spaces available at this workshop. For more information regarding this workshop and booking a spot for yourself, visit the Nikonian web site.


Tuesday, August 30, 2011

Cleaning Out The Cabinet

I'm cleaning out my lens cabinet and selling the lens that I no longer use. I have several well used lenses to select from, two of which are prime manual focus lens. I also have two AF lenses worth considering.

Here is a list of the lenses I'm selling, if your interested in any of these, send me a message. I'll be happy to forward a price and photo of said lenses.

Nikon 180mm f/2.8 ED manual focus lens

Nikon 85mm f/2.0 manual focus lens

Nikon 35-70mm f/2.8 AF lens

Nikon 14-24mm f/2.8 G ED AF-S lens

Sunday, August 28, 2011

SpyderCube-Not just your normal gray card


In my earlier post regarding DataColor Calibration, I discussed their product The Spyder LenCal™ Today I'd like to show you their SpyderCube™. The SpyderCube™ accelerates RAW processing in providing references to set the white balance, exposure, black level and brightness right from the start.

As the name suggests, it is indeed a cube. At the base of the cube there is a 1/4-20 thread or tripod mount and on the top, is a chrome ball with an elastic string for hanging it. With these to mounting options you should have no trouble placing it within your photo for a reference shot. I usually just have my subject hold it when shooting a portrait or I place it on an available level surface. The cube is made of a resin that is very durable, it's fade resist and the colors are not painted on but rather the actual color of the plastic itself all the way through. On each of the sides of the cube, you have all the relevant light information for the RAW adjustments. White Faces to define the highlights, Chrome Ball to measure catch light to analyse overexposed areas, Spectrally neutral 18% Grey Faces to measure color temperature and mid-tones in all lighting conditions. Black Face to define the shadows and the Black Trap to define absolute black. This is a wonderful reference tool to achieve accurate colors without trail and error in RAW processing.

I use Lightroom for all my RAW processing. I open my image in Lightroom and activate my warning buttons for under and over exposure, shown here in the red circles.

I first set my white balance by clicking my white balance eye dropper on the gray section of the cube, I choose the brighter one as represents my primary light source. I next adjust my exposure slider so that none of the high values are clipped on the cube. I then use the brightness to recover any changes to the mid-tones during the exposure adjustment. Finally, I use the black slider to show the black trap as a solid black. I have a screen capture showing this below.


Video on how to use the SpyderCube™ can be found HERE

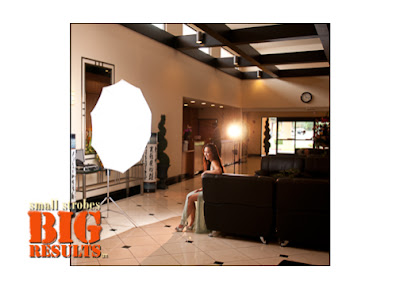
When shooting portraits using a bounce technique, this SpyderCube™ is worth it's weight in gold. I the photo below, you see the bounce off the wall as well as perhaps some of the green carpeting off the floor. Using a tool like the SpyderCube™ will help you with obtain actuate color.


There are similar products on the market which I have used and own. Many of those products are linear in nature, the SpyderCube is a 3D object that reflects the main light at an angle and I really like the Black Trap at the base for absolute black measurement.

I believe it costs about $49 dollars, it's small, lightweight and easy to use.

Wednesday, August 24, 2011

Light it!

Light It: Is the How-To Magazine for Studio Lighting and Off-Camera Flash is the first digital photography lighting magazine from Scott Kelby and KelbyTraining.com made exclusively for the Apple iPad. It features the industry’s top experts on photography lighting, studio lighting, small camera flash, portrait lighting, location lighting and more.

Scott Kelby has done it again, "Light it" is a beautiful magazine and I'm delighted to have been featured in this premiere issue. Thanks Scott for the opportunity and I hope I can take part in future issues.

You can download this App from iTunes. The Light It app is free of charge and so is the premiere issue, which boasts more than 50 pages of articles - featuring stunning "pinch and zoom" photographs, videos, and web links for a whole new reader experience. Light It is published 8 times a year and future issues will be available via the Light It app for $2.99 each. No subscription is required. Users can choose the issues they wish to download and back issues can be obtained instantaneously.


Sunday, August 14, 2011

Datacolor Calibration

I recently got my hands on several Datacolor products and I wanted to share my thoughts about them with you. Datacolor is the global leader in complete calibration systems for printers, monitors and lenses. One of the most exciting calibration tools to hit the market in recent years is the Spyder LensCal™.


Until I actually measured the focus performance of my camera and lens combinations, I excepted my images as being sharp. The Spyder LenCal™ provides a fast and reliable method of measuring the focus performance of your specific camera and lens combinations. It allows you to obtain razor-sharp focusing or just check to see that your lenses are working at their peak performance.

You'll need to be shooting with a camera that supports and stores autofocus adjustments. Here are a few common cameras with such support.

Canon (50D, 7D, 5DMkII, 1DMkIII, 1DMkIV, 1DsMkIII, 1DIV
Nikon (D7000, D300, D300s, D700, D3, D3s, D3x)
Sony (A850, A900)
Olympus (E-30, E-620)
Pentax (K20D, K7D)

This clever devise folds flat for easy storage and has a 1/4 20 thread for stand or tripod mounting. I have calibrated each of my lenses & cameras combinations and I now have confidence that I have the sharpest images possible. For the small cost of $59.00, you can't go wrong. A few of my lenses required no adjustment at all. Here is a link to a video on how it works.

Once you know you have sharp images, the next logical step is to insure proper color calibration of your camera sensor, your monitor and then printer. Datacolor has you covered on this front as well. I have the Spyder Checkr™ to calibrate my camera and the Spyder3Studio SR kit for calibrating my monitor and printer. More about these tools in my next post. DT


Wednesday, August 10, 2011

I'll Try To Catch Up

This summer is passing by fast, I've been extremely busy shooting assignments as well as teaching at various workshops. The corporate assignments are coming in faster then ever.

One of those assignments put me underground in a gold mine in Nevada. I was shooting for a South African based mining concern. There operation is entirely underground, not the most pleasant places to create photos. One of the photos my client wanted me to shoot was an image of miners walking out of the mine shaft and walking through the mine.

This first set up shot was a test to see how much light could be produced from one SB-800 behind the miners before they came to the surface. I could not decide if I wanted to light the wall behind the miners or shoot the strobe straight at their backs.

In the first example you see my assistant John holding the flash pointed straight at the camera.

In the next picture, I had John point the flash at the back wall.

Between the two, I preferred having the flash pointing at the miners back. The final image is shown here.

I also photographed miners walking through the mine. The best way to shoot this sort of thing is to back light them. I used a mine vehicle with it's headlights on for this purpose. I'm showing both variations, I can't make up my mind if I like it cool or warm, your thoughts?


I'll show you more from this assignment in the days ahead. I did want you to know that there are still spaces available at my Maine Media Workshop in Rockport. I'll be teaching a location lighting class Sept. 11-16th. For more information regarding that workshop check out the Maine Media Workshops Web Site.

A few more things to tell you about. I'm headed to Austria to visit a good friend as well as teach a series of SSBR workshops. If your interested in attending one of my Austrian workshops, please contact my friend Eric HERE