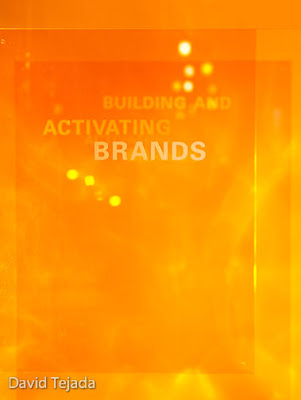
A few weeks back, I shot a project for a design firm that I've worked with for years. It's the same firm I shot the lab technician wearing the National Jewish Health coat.
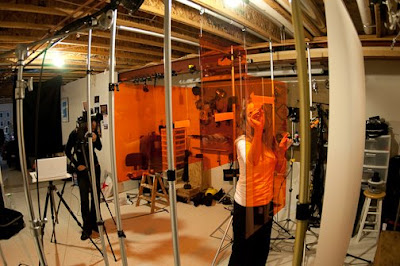
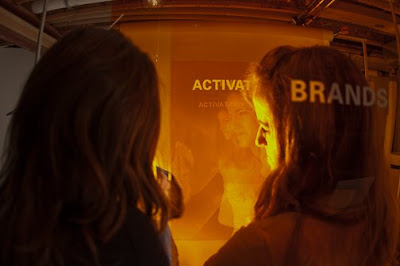
I was asked to create a cover shot for the design firms new capabilities brochure. The cover shot was a series of words placed on 3 different pieces of orange Plexiglass. The first sheet of plexiglass had the word BRANDS, the second sheet ACTIVATING and the third BUILDING AND. The first sheet with the word BRANDS was sharp and the rest of the word progressively became more out of focus by use of controlling my depth of field. I controlled the depth of field (DOF) by moving the sheets backselecting an f-stop that produced the effect we where looking for. This was a difficult shot to produce and it required most of the lights I own. Here is a look at the set up.
Like the previous project, I was provide a Photoshop file which served as a frame for which the image I was shooting was to fit in.
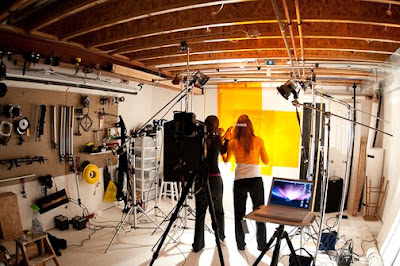
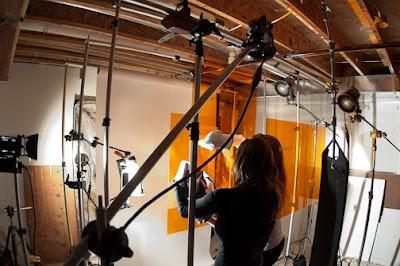 Let's walk through the set up and how this all fits together. I used 2 background poles and one boom to suspend each sheet of plexi sheet from. This allowed me the added control of height and distance of each sheet. The background was a sheet of translucent material which I was able to project light through and allowed me to create a pattern or texture to the light.
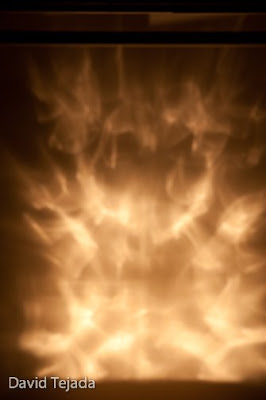
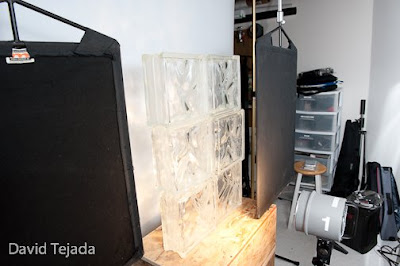 I ended up using a total of 9 glass bricks in order to create enough pattern onto the background of the final image. This is what the pattern looked like from the front and in far more focus than in the final image. Kinda looks like fire to me.
 We started out using a black cloth behind the camera position to block out unwanted reflection on the sheets of plexiglass. After looking at several test images, we realized we need some life put back into the image. We found that the reflections of lights behind the camera added just what we needed, almost. The reflection of lights in the upper right corner of the image are from the ceiling lights and the ones on the left just below and to the left of the word BRANDS were created with 2 SB-800's.
The lights on the ceiling where quite bright, I used neutral density gels to knock them down a bit. I had to do the same with the two SB-800's even though they were dialed down to 1/128 power. The SB's were not contributing to the exposure, their sole purpose was just to provide a reflection.
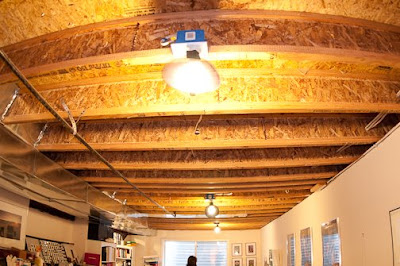
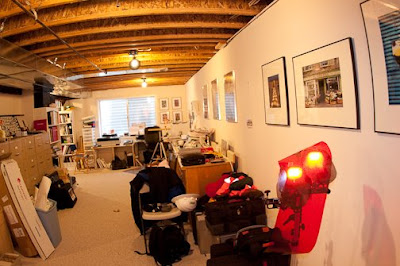 In order to get the SB-800's to fire, I used my SC-29 cord connected to my SU-800 command unit. I needed to do so because the strobes where positioned behind the camera.
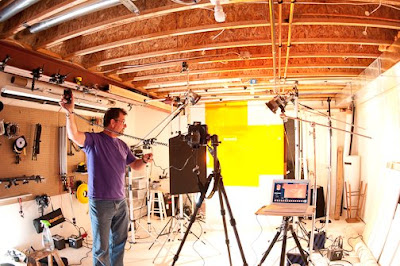 The lighting on the final shot required 5 Dynalite heads (modeling lights only), one Dedo light, one Tota-light and 2 SB-800's. I was running out of lights as well as space in my basement studio. You can see the wall behind me has been stripped clean, most of that gear is being used.
Here are just a few more images of the production as well as the final image.

12 comments:
It would never have occurred to me to use a photographer to produce that image. Seems like an obvious choice to use a graphic designer.
Great post David. Looks like a really interesting project. Also looks like the kinda job that would take no more than an hour or so sitting comfortably at a desk, using Photoshop. But where's the challenge in that, right?
Very interesting and informative David, Thanks!
That's really interesting. I still don't quite get why you would go through all that work for something that could be so simply done in photoshop. Could you maybe explain why you went through all that?
That's amazing as to how much work you put into that. I'm still confused as to why you put so much work into something that could have been photoshopped together in an hour? Maybe you could explain?
Definitely very interesting, and informative, Kudos for ingenuity and effort. Result looks great, but this seems to me, like it would have been far more practical and cost efficient done in photoshop.
Brilliant post.
Question? You shot through the glass bricks on the reverse side (from camera) of a translucent material to create the flame effect?
What is the material?
Thanks for sharing this post. Certainly inspiring.
James, I thought exactly the same thing. It seems that it would make sense to at least do the Building and Activating Brands text in Photoshop.
But this is great work.
Awesome post as always David!
Wow - look what this brought in the comments! Really shows the truism of the joke "How many photographers does it take to change a light bulb? 100 - 1 to do it and 99 to say how they would have done it."
I admire your work! Seeing this post,at first point I said to myself why didn't you do it in Photoshop... but that's the true beauty of Photography, hard work to get a natural true image/photograph and not a graphic design art. It reminds me of Dean Collins who made a few great cover-brochure photography in the late '80.
All the best and sorry for my bad english! Alberto B (Romania)
I too thought that this would be a graphics job. On reflection, doing this job in PS or Illustrator would likely yield a very perfect looking result. What David did here is produce a more unique and flavourful image. Even if I were to duplicate his efforts in the garage studio, the image would still be different and take on the characteristics of the space in which it was created.
I like your explanation for the process, but I have to agree with some of the previous comments. Why would someone commission a project like this to be done through photography when it could have been done with less time and money in Photoshop?
Post a Comment